
Are you looking for a new DIY project? Maybe an exciting addition to your garden or backyard to enjoy during the summer months? Here’s a simple idea you can try at home and build your very own DIY grain silo gazebo.
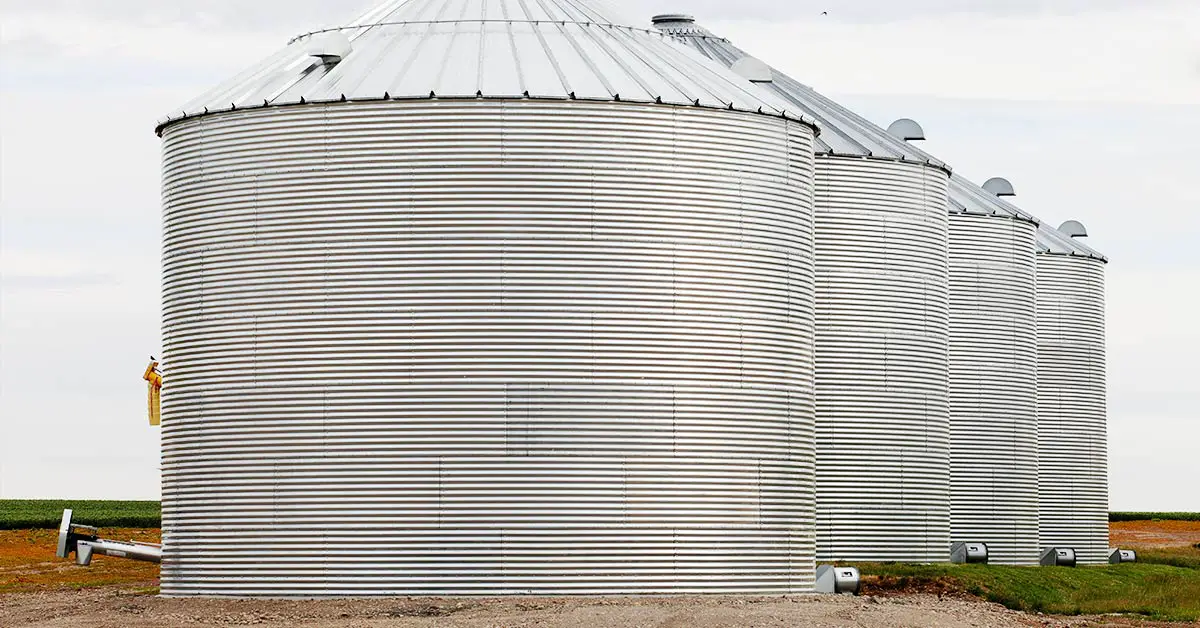
It is so common to come across a grain silo or storage bin in a rural setting. You almost feel out of place if you looked at a farmland horizon and didn’t see at least a couple. They are really inexpensive, and you can sometimes even find them for next to nothing. Perhaps someone no longer needs their silo, and they’ve decided to scrap it. This is the perfect opportunity to step in and repurpose the materials for your DIY grain silo gazebo project. You could build a barbeque area or outdoor kitchen, a gazebo, a guest house, or even a storage room!
The sturdy galvanized metal structure will withstand the elements for many years to come. All the building materials used for your DIY grain silo gazebo are relatively cheap and easy to come by, and they will be very durable once built. Repurposing previously used building materials or upcycling, as it is called, makes it an environmentally conscious project too. It also has an eccentric and rustic country feel which can add a lot of character to your home. Let’s take a closer look at where to begin when building your DIY grain silo gazebo.
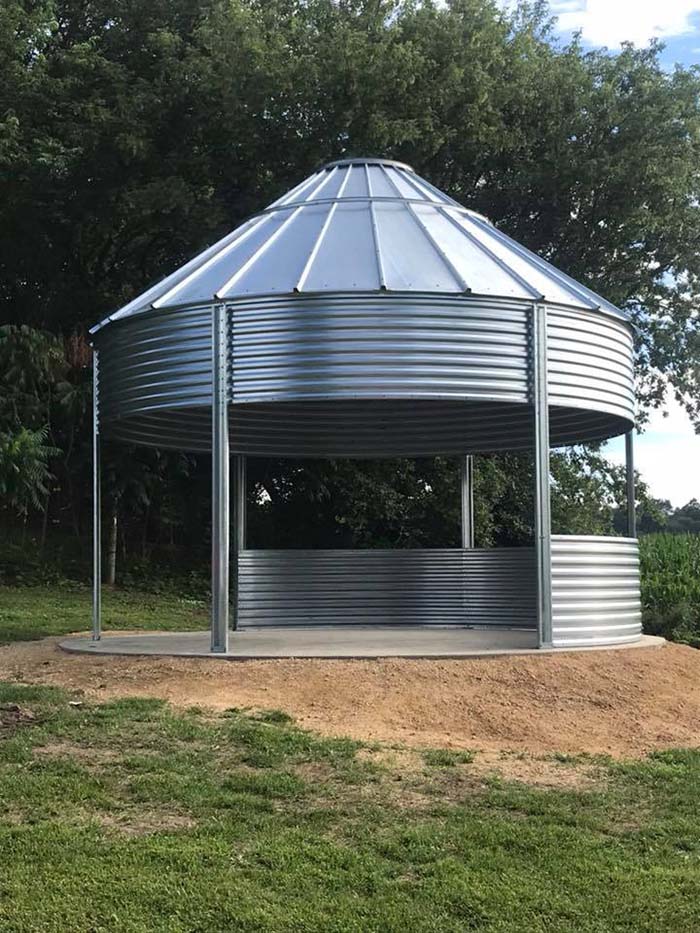
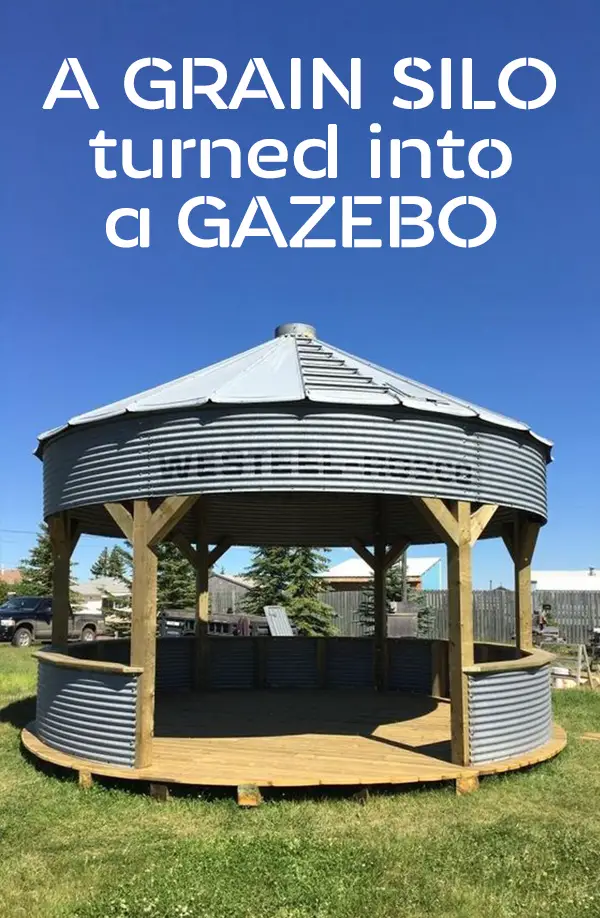
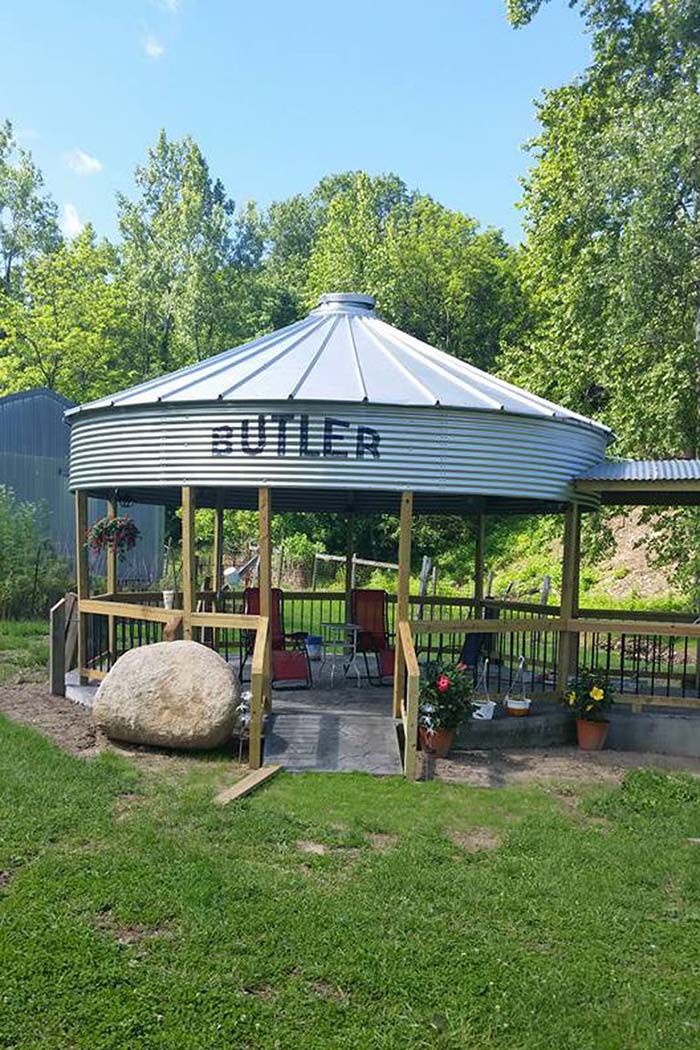
First, check out these amazing Silo Gazebo’s


Building your own DIY Grain Silo Gazebo
You will need this build: the grain silo or grain storage bin, the support beams, and the bolts to hold it all together. The construction will also require a mobile crane, a drill, and a concrete breaker. The following steps will help you put everything together, read carefully and come back to this point if you feel like you missed anything.
First
Start by laying a concrete foundation for the floor. This will include each of the entrances on either side of the main circular structure. Ensure this is slightly larger in area than that of the silo itself. Once the concrete has set, allow it to cure a few days so it can harden properly. If you by chance have an outdoor concrete surface somewhere in your garden, by all means, simply use it as a foundation for your gazebo and skip this step.
Next, raise the silo structure into the air temporarily using the mobile crane. Connect it up with the crane’s hook and raise it to the height you require. You will now need to put the support legs into place. You will need to decide between using wooden beams or metal panels as your support. Either of these choices will require that you use the correct measurements and amount of materials necessary to provide strong enough support for the silo.
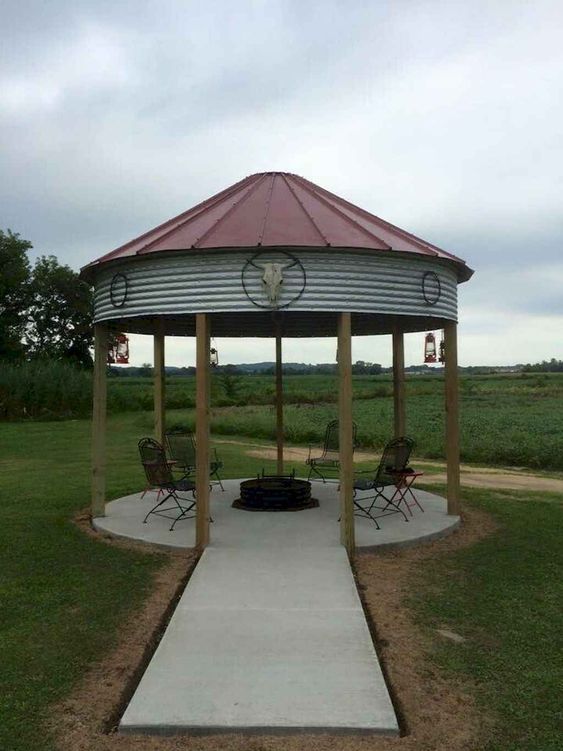
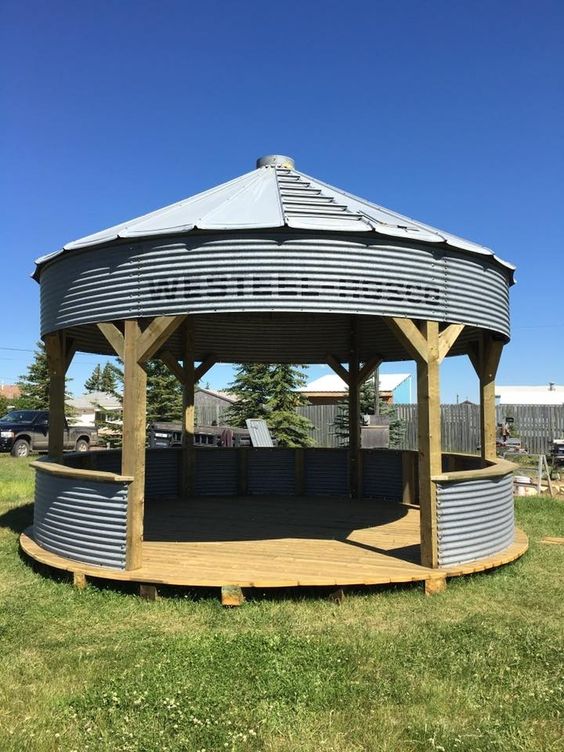
In this instance, the silo is placed onto 8 wooden beams over the main round area and 4 extra beams for each of the entrances on either side. The beams have been measured and cut to a uniform length, which means they can easily be fixed to the silo gazebo roof and joined to the concrete flooring.
The beams should have equal gaps between them when they are placed on the edges of the circular area. They will then be bolted to the floor. At this point, you will need to choose the position of the entrances, as the following step involves placing the sheeting underneath the gazebo roof. This ring of metal sheeting will close each side of the gazebo structure.
Then
You can cut the sheeting from the leftover silo materials. Be sure to cut the sheets accurately at the same length as the space between each support beam. It is recommended that you measure the distance once the beams are in place before cutting these sheets.
In the next step, you will fix the sheeting to the support beams. Place a sheet, then drill into it and the beam and use torqued bolts to fix them once you have finished. Remember to leave spaces without sheeting for each of the entrances. Use more of the remaining silo material and cut sheets for the awnings of each entrance.
You can ensure great results here by pre-measuring the area of these sheets. Inspect the structure from different vantage points to see if there are any problem areas. If you are satisfied and the structure seems properly aligned, you can then release the gazebo roof onto the structure by lowering it carefully into place. When this is secure, use bolts to fix it into place.
Finally
All that remains now is to decorate your new gazebo with some outdoor lighting, plants, and perhaps even a cactus or two, depending on the theme of your garden. You now have a perfect outdoor space for gatherings, meals, and merriment.
Inspired by Decor Home Ideas
Keep Reading: Tutorial: Build an amazing DIY pergola and fire pit with swings