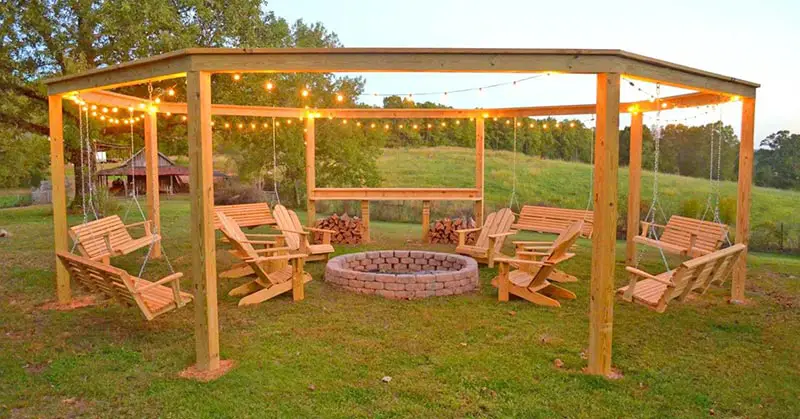
Do you feel like something’s missing from your backyard? Looking for a place to host all your friends and family? A pergola might be just what you’re looking for. And you can even build your own with ease!
A pergola is similar to a gazebo, but without a roof. It’s usually a shaded walkway or sitting area made of wooden posts and a cross section of beams. They often are covered in vines or other plants to make a ‘roof’. Here’s how you can create the backyard you’ve always dreamed of.
DIY Pergola Instructions
How long you need
This project can take anywhere from a weekend to two weeks depending on how many people you have, skill level, and availability.
What you need
Tools
- Measuring tape
- 4’ level
- Mason’s line
- Marking paint
- Speed square
- Reciprocating saw
- Corded drill
- 12” long ½” bit
- Skill saw/circular saw
- Drill driver
- Rotary level (optional)
- Auger
- Post hold digger
- Shovel
Materials
- Seventeen 6x6x12’ pressure treated pine beams
- Ten 2x10x12’ pressure treated pine beams (wood)
- Two 2x6x12’ pressure treated pine beams
- Two corbels
- Two bags of quick setting concrete per post
- 100-125 stone landscape blocks
- Landscape adhesive
- Twelve ½”x10” eye bolt with nut
- 5lb box of 4” exterior decking screws
- Five glass bulb string lights (optional)
Cost
Total cost ranges from $2000-5000 depending on where you buy things, tool rentals, material choices and potential labor costs. The pergola itself can cost around $1300 for all material except seating and lighting.
How to Build your Own Pergola
Preparation
- Choose a large enough area (about 22-24’ in diameter) and place a stake in the center
- Use a tape measure to determine fire pit and pergola radius, mark the points (*materials specified are for a 4’ fire pit radius and 12’ pergola radius)
- Tie a string and hold it tight, then walk in a circle using the paint to mark the exterior circle
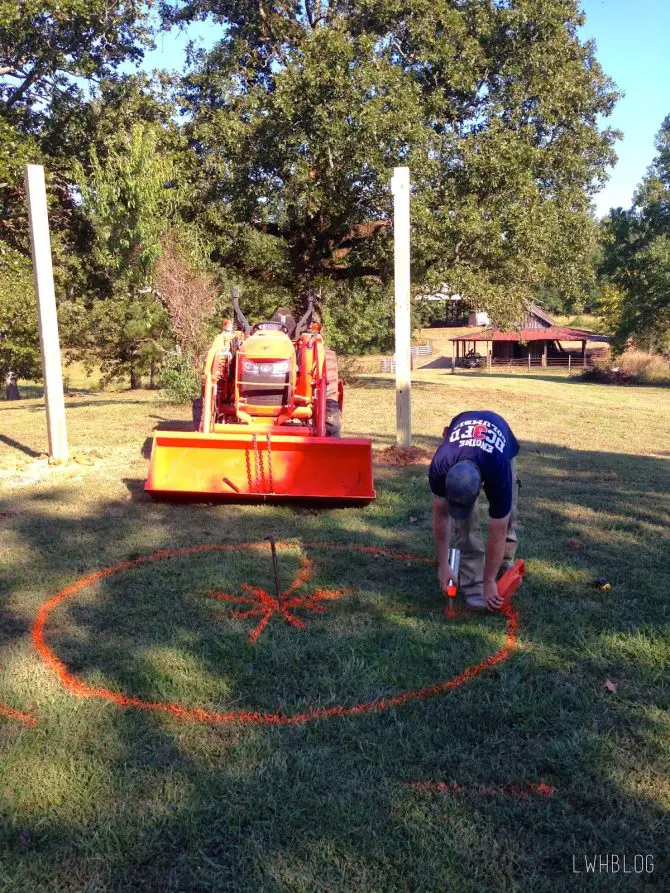
- Find out where you want your entrance to be, then mark 12’ intersecting lines around your circle. Start at the end of the last marker working your way around the circle until you have 8 by the end
- Use an auger to dig the post holes 3’ deep, remove any excess dirt left behind
Installing posts
- Place a 6x6x12 wooden post in each hole with one flat face facing the center of the pergola
- Use a level to level the post
- Pour concrete bags around the base of the post and continue to level before the concrete sets
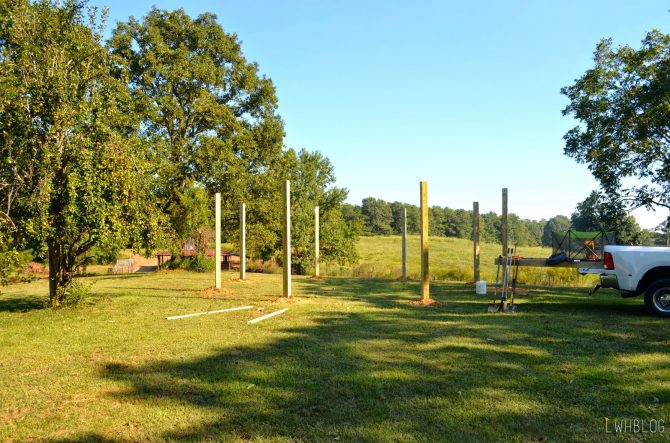
- Make sure all posts are the same height by using a rotary laser level
- Cut to the shortest post height by marking square lines on all four sides with a speed square. Use the circular saw to cut along the lines on each side, then use a reciprocating saw to cut the remaining wood
Installing the fire pit
- Dig a trench around the circumference of the pit about as deep as one of your stone blocks to anchor the pit
- Lay blocks tightly together
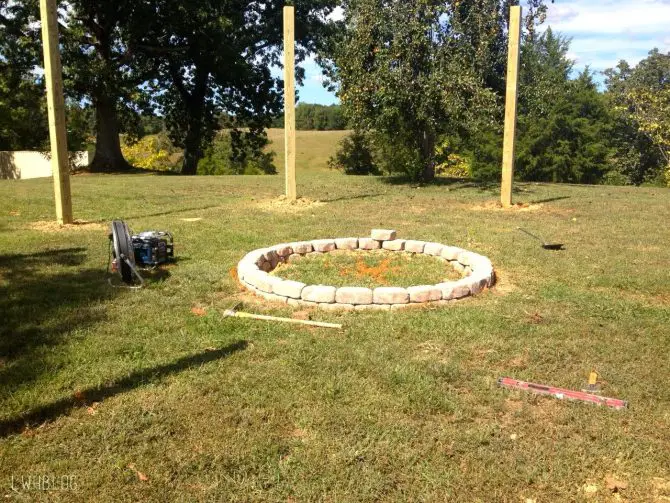
- Spread landscape adhesive on top of the first row and begin laying the second row, staggering the seams
- Repeat until as tall as you desire (about 4 levels is good)
Installing the top beams
- Measure and mark the top of each beam according to the diagram
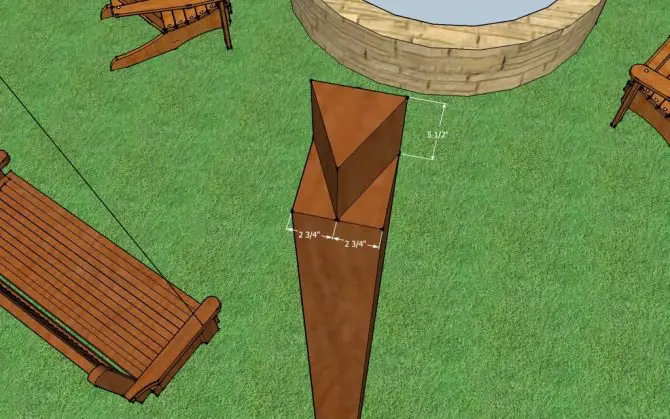
- Cut the beams at an angle and make sure they fit tightly together
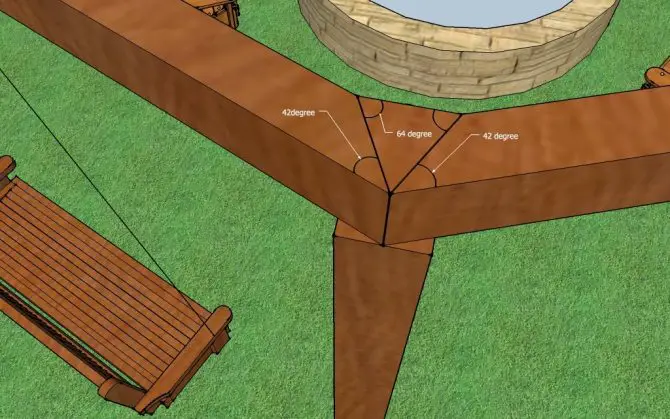
- Cap the beams with a top plate to secure them. Make them meet evenly in the corners over the edge of each post
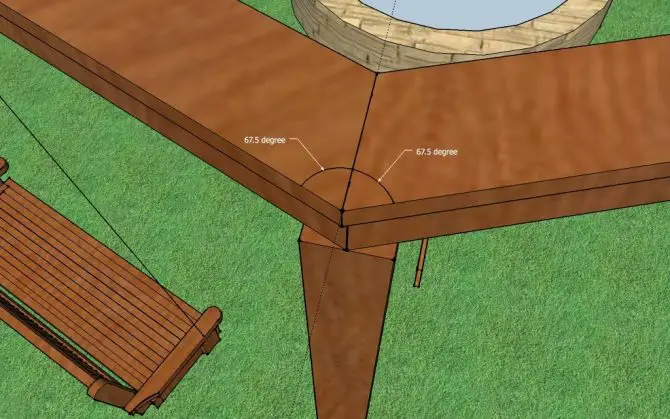
- Secure the top plates with 4” deck screws and one into the beam every 10” along
Installing swings
- Find the center of the pergola and measure evenly both ways depending on the length of your swing
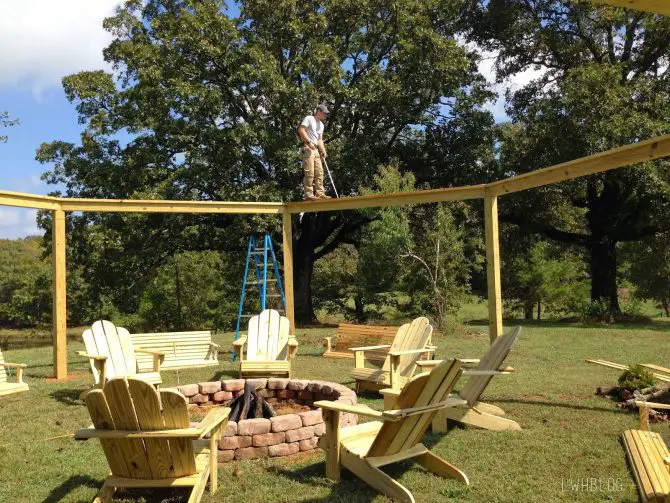
- Using the corded drill with a 12” long and ½” bit, make holes for the eye bolts. Install the eye bolts and secure the swings
Bar/storage area
- Directly across from your entrance, divide the distance between the two posts into thirds and use the auger to create holes
- Place two 6×6 posts cut to 5’ tall to support the bar top and stabilize with the concrete
- Trim 1.5” off the front and rear facing sides of the tops 5.5” deep
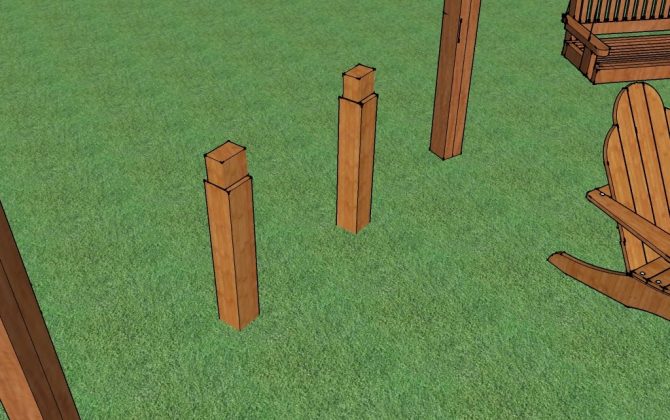
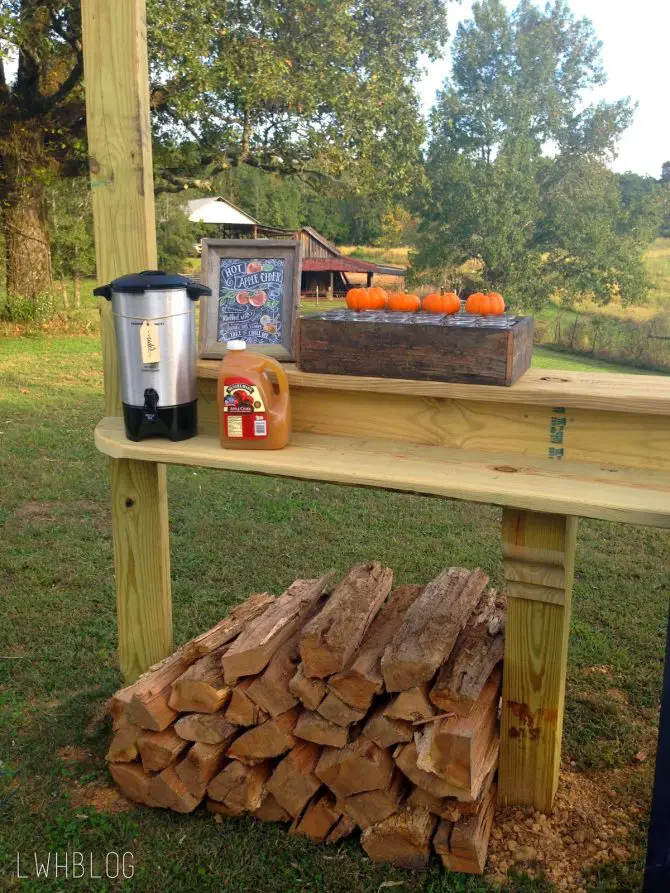
- Install two 2×6 beams to fit between the two posts, resting on the bar posts. Attach with screws and attach a corbel to both bar posts beneath the beam for more support
- Use two 2×10 beams for the upper and lower surfaces of the bar, level them and secure with screws
Finishing
- Allow the wood to dry and acclimate, then seal with a waterproofing product
- Hang the string lights if you wish to have any
- Sit back and enjoy all your hard work!
So what are you waiting for? Your backyard oasis awaits.
The Little White House Blog originally produced this tutorial in partnership with Remodelahics. You can find fully detailed plans here.
Keep Reading: These Old Trampolines Have Been Transformed into Outdoor Dens and I Need One
